


How To Do Finger Waves?
In recent years, finger waves has become more and more popular among beauty enthusiasts, which can provide you with a vintage, wavy, and sophisticated appearance.
You may have heard of finger waves before, but you don’t know the exact meaning of it.
The following blog will explain everything you need to know about finger waves in detail, which can help you make a better choice.
What’s more, you will also learn how to do finger waves at home step by step, saving your time and energy.
1. What are Finger Waves?
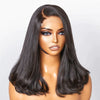
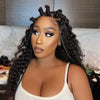
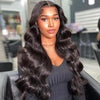
Finger waves refer to a kind of hairstyle that shapes your natural hair into sleek and flat S-shaped waves, which usually sit against to your scalp, creating a glamorous, sophistication, and nostalgic appearance for you.
Frankly speaking, finger waves is pretty popular among beauty enthusiasts and influencers, suitable for various occasions and outfits.
Finger waves was popular in the 1920s and 1930s, which was associated with the flapper style of the Jazz era.
What’s more, finger waves is also one of the popular hairstyles among actresses, suiting formal occasions perfectly and effortlessly.
Balancing extraordinary performance and practicality effortlessly, finger waves has gradually become one of the signal Black hairstyles, making it an excellent choice for those looking for an attractive and show-stopping appearance.
Recently, finger waves has made a comeback, which has been favored by celebrities like Beyonce, Rihanna, and so on.
Generally speaking, finger waves is pretty easy to achieve, which means you don’t need to spend too much money and time on it.
That is to say, you can only use your fingers, a comb, and a few styling products to achieve this stunning appearance.
The following part will also introduce the key tools to you in detail, so you can scroll down to see more.
Exuding a retro and vintage vibe effortlessly, finger waves is a wonderful choice to try, providing you with a wet, wavy, and uniform appearance.

2. Things that you should prepare to create wonderful finger waves:
In order to create wonderful finger waves, there are some essential things that you should prepare in advance, including hair gel, mousse, a rat-tail comb with fine teeth, a hair dryer, and duckbill hair clips.
What’s more, if necessary, you can also prepare a head scarf and a mirror.
The following part will explain the main function of these things to you in detail, helping you better understand the effects of them.
(1)Hair gel:
It is a must-have product that can create structure and hold hairstyles, making your finger waves last as long as possible, without frizzing or falling out.
(2)Mousse:
It is a crucial product that can help you get defined, smooth, and hydrated waves.
(3)A rat-tail comb with fine teeth:
On the one hand, a rat-tail comb can help you to create a precise wave pattern.
On the other hand, a rat-tail comb can help to smooth the hair gel and mousse in your hair, and create perfect S-shaped waves with your fingers.
(4)A hair dryer:
A hair dryer can not only dry your hair in a short time, but also help to set your hairstyles.
Compared to air drying, blow drying is more convenient and faster for you to dry your hair.
Of course, if you have enough time, you can also choose to air dry your hair.
For those looking for more differences between blow drying and air drying, you can read this blog to get more information.
(5)duckbill hair clips:
Duckbill hair clips can secure your hair in the right place, helping you to achieve wonderful finger waves.
For example, duckbill hair clips can keep your hair in place while you are creating finger waves in a single section.
If you have long hair, you are sure to need some duckbill hair clips, which can help you to get finger waves in an easier way.

(6)A head scarf (optional):
When you are blow drying your hair, you can also use a head scarf to wrap the hair up, which can help set your hairstyle.
(7)A mirror (optional):
Of course, you can prepare a mirror in advance, helping you better observe the back of your hairstyle.
3. How to do finger waves step by step?
(1)Step 1: Begin with clean and damp hair.
First of all, you should prepare your hair well, making sure your hair is clean and damp, which is essential and important for creating perfect finger waves.
If you are on a hair care routine, you can wash your hair and apply some leave-in product to the hair.
If your hair is clean and dry, you can spray some water on your hair, which can moisten your hair, helping you to better mold and shape the finger waves.
(2)Step 2: Apply styling products.
Secondly, it is time for you to apply styling products to your hair.
Just as it has been mentioned before, the mousse can moisturize and smooth your hair, helping you to get soft, defined, and hydrated waves.
The hair gel is important for you to create and keep structure, which can hold the hair in place, avoiding frizzing or falling out.
In order to achieve the best results, you should apply both mousse and hair gel to your hair, combining these two products based on your hair type.
To tell the truth, the more mousse, the merrier the hair.
(3)Step 3: Section your hair.
Thirdly, you can section your hair with a fine-toothed rat-tail comb.
First and foremost, you should divide your hair into top and bottom parts from one ear to the other ear.
Then, you can create vertical sections in both the top and bottom parts.
Generally speaking, you can create four to six sections in each part, approximately one-inch wide.
Please remember the more sections you part, the smaller and more intricate the finger waves will be.
Therefore, you should make the final choice based on your demands and preferences.
(4)Step 4: Create C-shaped waves with a comb and your fingers.
Fourthly, you can take one of the vertical sections to create C-shaped waves with a comb.
Generally speaking, you can use your fingers to pinch the hair at the base of the C, and then create perfect C-shaped waves with the rest of the hair.
What’s more, you should make sure the waves face the other direction, which will make them look like a backward C.
(5)Step 5: Secure the wave with a duckbill clip.
Fifthly, you should secure each wave with a duckbill clip, which can help the wave stay in place, without leaving a crease on your hair.
Generally speaking, you can place the duckbill diagonally across the wave, keeping the flat side against your scalp.
Of course, if you have very short hair, you can skip this procedure.

(6)Step 6: Repeat this process with each section.
Sixthly, you should repeat this process with each vertical section on the top part of your hair.
After finishing the top part, you can finish the bottom part in the same way.
(7)Step 7: Dry your hair.
After all the waves are created and clipped, you can dry your hair.
Generally speaking, both air drying and blow drying are feasible.
For those who don’t want to wait for a long time, drying the hair with a blow dryer is a more convenient choice.
Once your hair is dry, your waves will be set.
(8)Step 8: Finish your finger waves.
Last but not least, you should remove the duckbill clips in a gentle way.
To get more defined waves, you can also use your fingers to separate the waves.
If you want to keep the finger waves as long as possible, you can also apply some hair spray to your hair.
(source: erinparsonsmakeup)
4. Which length of hair can be for finger waves?
Generally speaking, finger waves is suitable for short hair and medium-length hair, typically no longer than shoulder-length hair.
For those with long hair, it is more difficult and trickier for you to create waves.
However, if you really want to achieve finger waves, you should apply more hair products and put more effort.
5. How long do finger waves last?
Usually, finger waves can last three to five days, varying from different hair types.
Although finger waves is suitable for various hair types and textures, it will work best on certain hair types and hair textures.
For example, finger waves is more suitable for hair with medium thickness.
If your hair is too thick, it will be hard to create finger waves.
For those with slightly straight or wavy hair, it is easy for them to create perfect finger waves.
However, if the hair is too curly, the finger waves is hard to create.
Besides, the finger waves can not last for a long time.
As we all know, hair products and protection will also play an important role in the duration of finger waves.
If you use hair products properly and protect your hair at night correctly, your finger waves can last up to one week.
For example, during sleeping, you can wrap your hair up with a satin or silk scarf, which can minimize the friction on the hair, keeping your finger waves as long as possible.
Conclusion:
After reading this blog, you must have a more comprehensive and systematic understanding of finger waves, which can help you make a better decision on it.
What’s more, you have also learned how to do finger waves at home step by step, saving you money and energy.
It’s my pleasure if this blog can really address your concerns and problems about the finger waves.
If you have any questions about human hair wigs, please feel free to leave a comment, and I will respond to you as soon as possible.
Leave a comment